
NUnit Testing - Part 1
A series of posts covering NUnit Unit Testing Framework. Part 1 discusses NUnit basics, package installation, writing and running tests.
Introduction
If you're writing unit tests on any flavour of NET Framework then you're likely to be using either Visual Studio Unit Testing Framework (MSTest), NUnit or xUnit.
NUnit is a popular unit testing framework, currently sitting at #24 in the nuget download rankings, but notably, behind the various xUnit packages.
NUnit is similar to the other testing frameworks in that it requires the developer to create a test project, separate from the code project. The test project, usually a class library, contains classes (fixtures) containing methods (tests) which executes your code and checks (asserts) it is functioning correctly.
NUnit provides various nuget packages for integrating with your .NET projects.
All examples can be downloaded from the NUnit.Examples repository.
Creating a test project
Depending on which version of .NET your test project is targeting, you'll need to add different packages. For now, the following examples assume you're targeting .NET Core.
Using your favourite IDE or .NET Development tool, create a new .NET Core class library project. Add the following nuget packages.
NET Core projects
For modern .NET Core test projects, you'll need to add the following packages to your csproj file
<PackageReference Include="Microsoft.NET.Test.Sdk" Version="16.4.0" />
<PackageReference Include="NUnit" Version="3.12.0" />
<PackageReference Include="NUnit3TestAdapter" Version="3.15.1" />
NET Framework projects
For classic .NET Framework test projects you only need to add nunit package to packages.config
<?xml version="1.0" encoding="utf-8"?>
<packages>
  <package id="NUnit" version="3.12.0" targetFramework="net472" />
</packages>
First test
We'll create a very simple Add method which just adds the given values and returns them.
public class QuickStart
{
    public static int Add(int value1, int value2)
    {
        return value1 + value2;
    }
}
Test Fixture
Next, we'll create a test fixture and our test. Add a class and annotate it with TestFixture. Now create a method with void return and annotate it with Test. Add a statement which calls your implementation method and assigns the result to a variable. Finally, add an Assertion which compares the expected value with the actual value.
[TestFixture]
public class QuickStartTests
{
    [Test]
    public void AddTest()
    {
        // Arrange
        const int value1 = 5;
        const int value2 = 3;

        // Act
        var result = QuickStart.Add(value1, value2);

        // Assert
        Assert.AreEqual(8, result);
    }
}
Arrange, Act, Assert which is commonly known as the AAA Pattern . This is a way to logically split the test into using simple comments. Running tests
Typically, developers run tests through the same coding environment. The following lists some of the test runners available with various .NET development tools.
Visual Studio
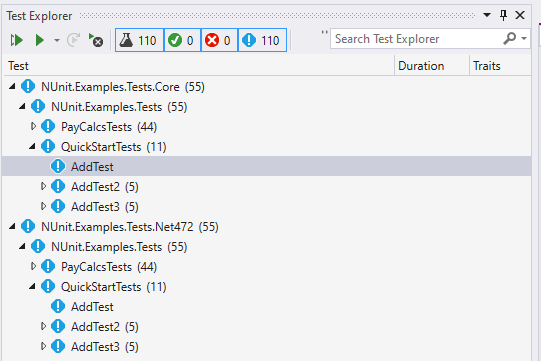
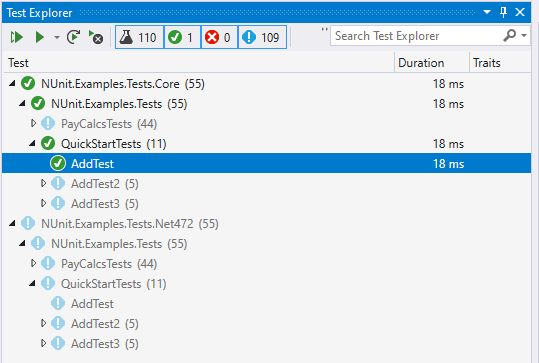
Visual Studio provides a built-in test explorer. From Test menu, click Explorer or type Ctrl+E, T shortcut. You may need to build your solution first, but eventually, Visual Studio will inspect your solution and display all your tests in a tree view panel. From the explorer panel, right-click on a test and click Run. If it passes, it should show a green tick against the test.
Resharper
As an alternative, if you're using Resharper then you'll have access to its more comprehensive test runner. See JetBrains Rider section below for an example.
Visual Studio Code
Visual Studio is an alternative cross-platform code editor which is becoming increasingly popular, particularly for Linux and Mac users. Visual Studio code has various extensions for supporting development on .NET Core platform.
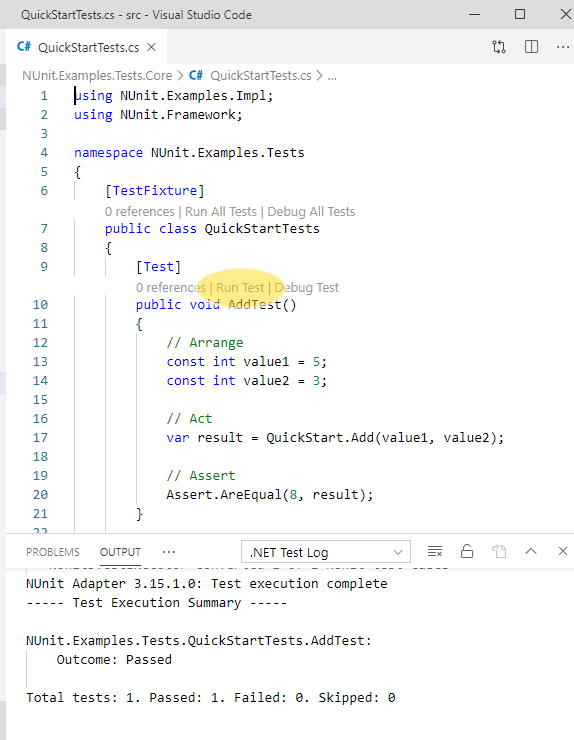
Using a terminal, navigate to your source code folder and type code . which should launch VS Code and show your VS projects in the explorer panel. If not already installed, VS Code will inspect your projects and suggest to install the various C#, dotnet and nunit extensions.
Once installed, when you open a class file, VS code should show some annotations against the fixture and test. From here we can choose to Run All Tests or just Run Test against a single test.
JetBrains Rider
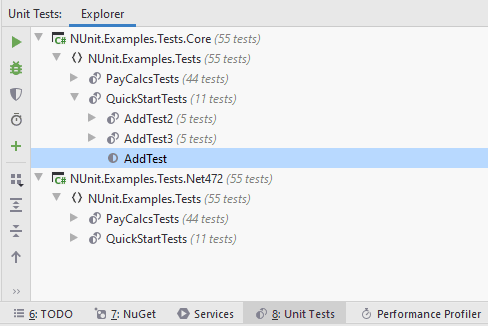
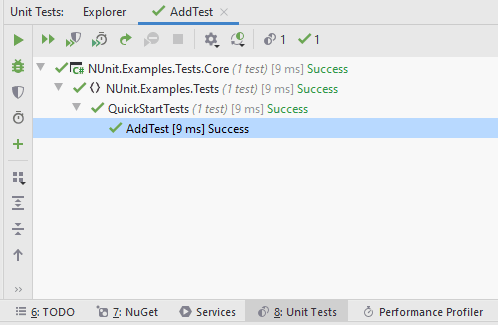
If you're lucky enough to be using Rider IDE then again you'll have access to the same Resharper test runner. Open up the Unit Tests pane and navigate to Explorer tab. Select a test and click Run Selected Unit Tests or type Shift-Enter.
Command line
dotnet CLI
CLIs are all the rage these days. .NET Core has its own CLI called dotnet which is used to create and update .NET Core projects. It also has a built-in test runner. Simply navigate to your test project source code folder and type dotnet test to run all tests in the project.
PS C:\code\neildobson-au\NUnit.Examples\src\NUnit.Examples.Tests.Core> dotnet test
Test run for C:\code\neildobson-au\NUnit.Examples\src\NUnit.Examples.Tests.Core\bin\Debug\netcoreapp3.0\NUnit.Examples.Tests.Core.dll(.NETCoreApp,Version=v3.0)
Microsoft (R) Test Execution Command Line Tool Version 16.3.0
Copyright (c) Microsoft Corporation.  All rights reserved.

Starting test execution, please wait...

A total of 1 test files matched the specified pattern.

Test Run Successful.
Total tests: 55
     Passed: 55
 Total time: 2.3408 Seconds
See docs and NUnit testing article for further information about dotnet CLI testing.
NUnit console
For .NET Framework projects, NUnit provides NUnit Console Runner which is a separate executable which can be downloaded from here.
Writing Tests
Test Cases
Although the previous test is correct (it passes), it only provides a single example data set. When testing more complex methods, we'll need to try different permutations of test data to ensure the method is still working correctly with each permutation. To assist with this, we can use TestCase.
[TestCase(0, 0, 0)]
[TestCase(0, 4, 4)]
[TestCase(4, 0, 4)]
[TestCase(5, 3, 8)]
[TestCase(-1, 7, 6)]
public void AddTest2(int value1, int value2, int expectedResult)
{
    // Act
    var result = QuickStart.Add(value1, value2);

    // Assert
    Assert.AreEqual(expectedResult, result);
}
This time we've annotated our test with some TestCase Attributes. This will instruct the test runner to run the test method for each TestCase and attempt to map the values into the test method arguments. Now we have increased the quality of the test by providing more test data permutations including zeros and negative numbers.
NUnitAttribute which is the base class NUnit uses to register the method is a test method. This means as long as you've annotated the method with at least one NUnit Attribute then you don't need to keep adding Test Attribute in addition to the others. An alternative and cleaner approach to the above is to clearly express ExpectedResult in the TestCase and instead of Asserting the result, we can just return it and NUnit will automatically perform the assertion.
[TestCase(0, 0, ExpectedResult = 0)]
[TestCase(0, 4, ExpectedResult = 4)]
[TestCase(4, 0, ExpectedResult = 4)]
[TestCase(5, 3, ExpectedResult = 8)]
[TestCase(-1, 7, ExpectedResult = 6)]
public int AddTest3(int value1, int value2)
{
    // AAA
    return QuickStart.Add(value1, value2);
}
Summary
In this first post of the series, I introduced NUnit and provided instructions on how to set-up your test project, how to write a simple test, and demonstrated a number of ways to run your test. I also showed how you can improve test quality by providing additional test cases.
In the next post, I'll cover more advanced testing scenarios.