
Creating a Docker host on Vultr cloud
Using Vultr cloud to create an Ubuntu Server host Virtual Machine running Docker.

Introduction
Vultr is a high-performance, low-cost, no-frills cloud provider which provides simple, easy to set-up Virtual Machines, applications and storage with just a few clicks.
The following demonstrates how to set-up a Docker host and containers using Vultr One-Click Apps feature, and how to set-up your private network so that your other Virtual Machines can connect to your containerised applications.
As part of the demonstration, I'll set-up Neo4j and Redis as test containers, and finally, create a Docker Compose file so that both containers are launched together.
I'll assume that you already have an account with Vultr, and that you've logged into your dashboard.
Part 1: Create Docker Host
The steps for creating a Docker host will include provisioning a Linux Virtual Machine. As part of this you'll need to securely connect to the host to perform some configuration tasks and of course, run Docker.
Create SSH Keys
Use a compatible OS to generate SSH keys using the ssh-keygen command. This should be available on most Linux distributions. On Windows, this should be available through WSL, or use some other tool, such as PuTTYgen.
Run ssh-keygen -t rsa -b 4096 to generate the public/private key pair. It will ask you for a folder to save the keys, and optionally a passphrase to secure keys.
PS C:\Users\ndobson> ssh-keygen -t rsa -b 4096
Generating public/private rsa key pair.
Enter file in which to save the key (C:\Users\ndobson/.ssh/id_rsa):
Enter passphrase (empty for no passphrase):
Enter same passphrase again:
Your identification has been saved in C:\Users\ndobson/.ssh/id_rsa.
Your public key has been saved in C:\Users\ndobson/.ssh/id_rsa.pub.
The key fingerprint is:
SHA256:********************************** ndobson@barnho@HO-ITDEV25
The key's randomart image is:
+---[RSA 4096]----+
|.oE   oo+ =+. .  |
|+. . o * *   . . |
|..  + o O + . .  |
| .   o = * . ..  |
|  .   o S .  o.  |
|   = . o =   .o  |
|  = . o + o  ....|
|   . . . o ..  o.|
|        .  ..   .|
+----[SHA256]-----+
Locate the folder where the keys are stored and copy the public key to the clipboard using whichever method you find convenient. Example: cat C:\Users\ndobson/.ssh/id_rsa.pub. Now highlight and copy all the text.
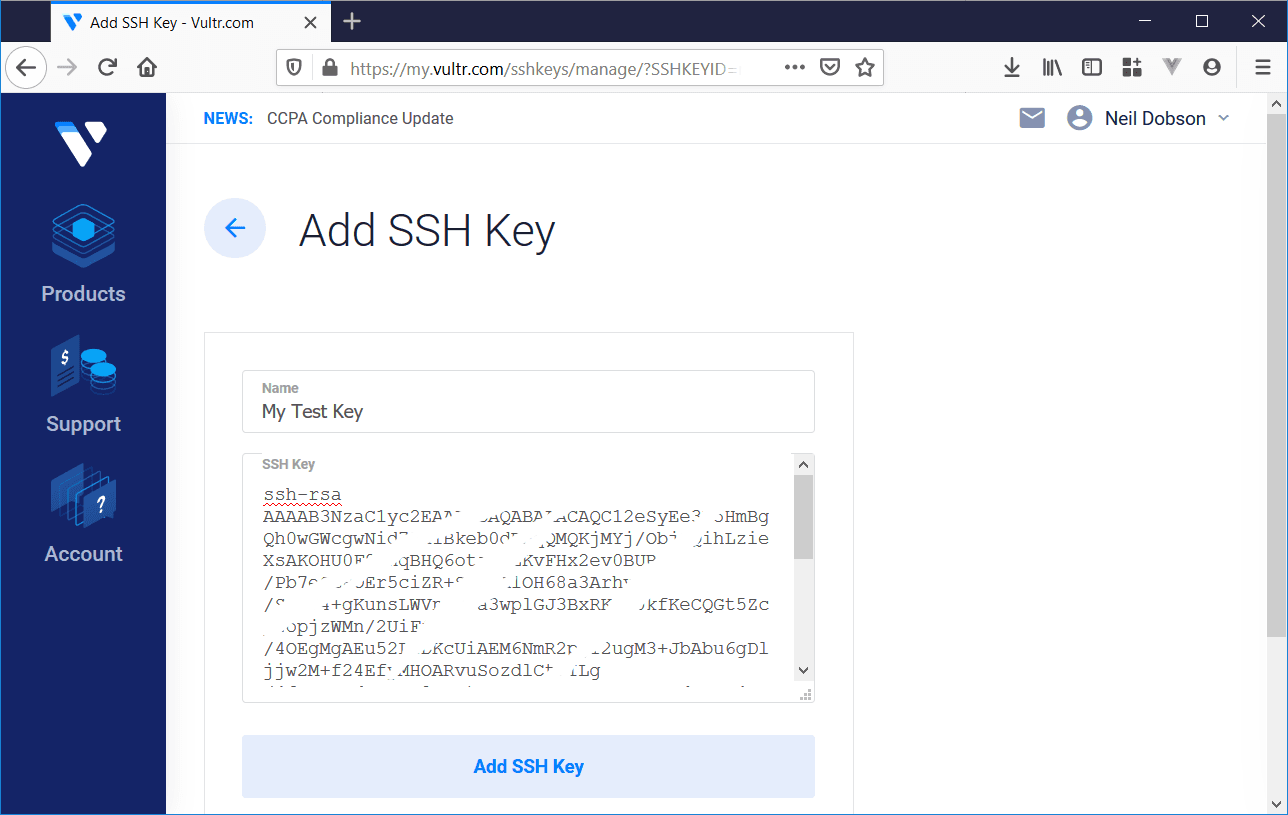
Store SSH Public Key on Vultr
From the Vultr dashboard, navigate to Products, click SSH Keys tab and click Add SSH Key button. Enter a name for
the Key such as My Test Key, paste the clipboard contents of the public key and click Add SSH Key button to save for later use.
Deploy Virtual Machine
Now we have our SSH keys we can proceed to deploy a new Virtual Machine which will become our Docker Host.
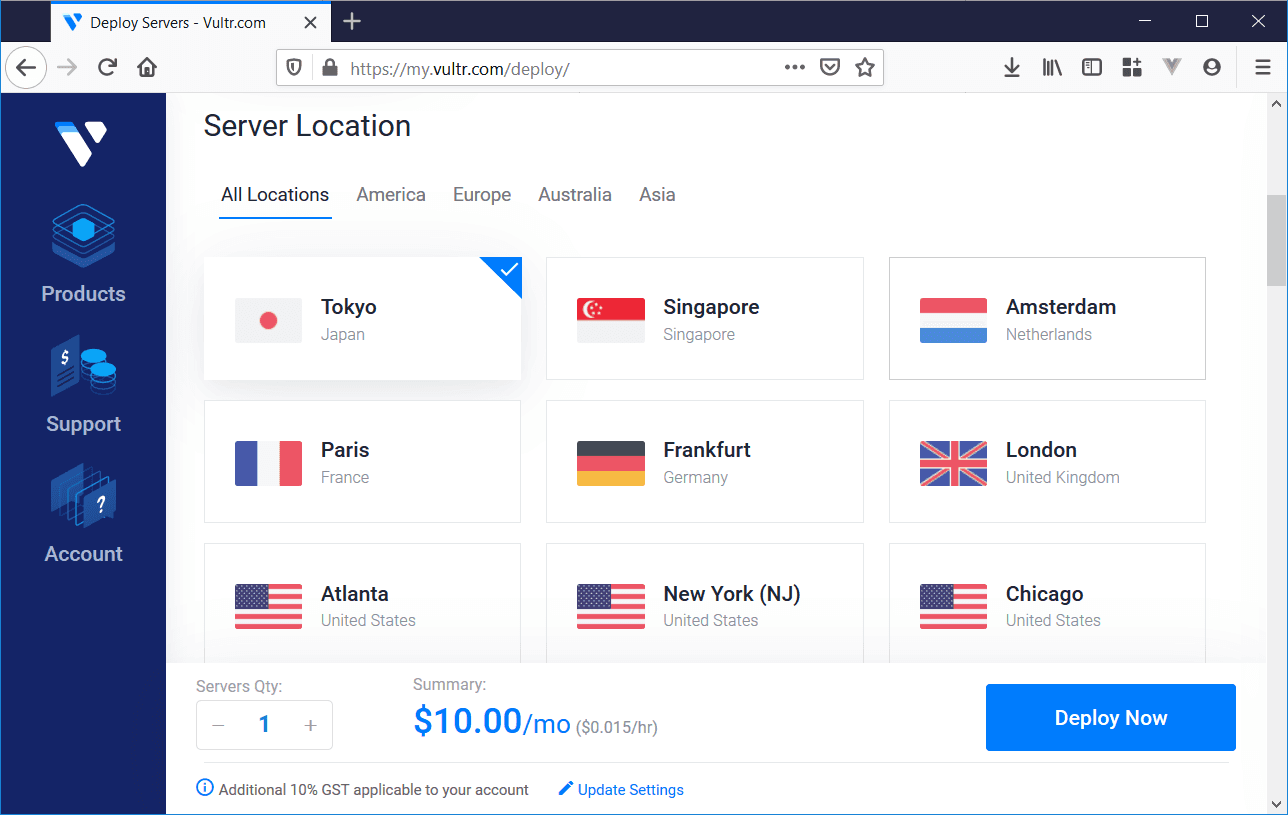
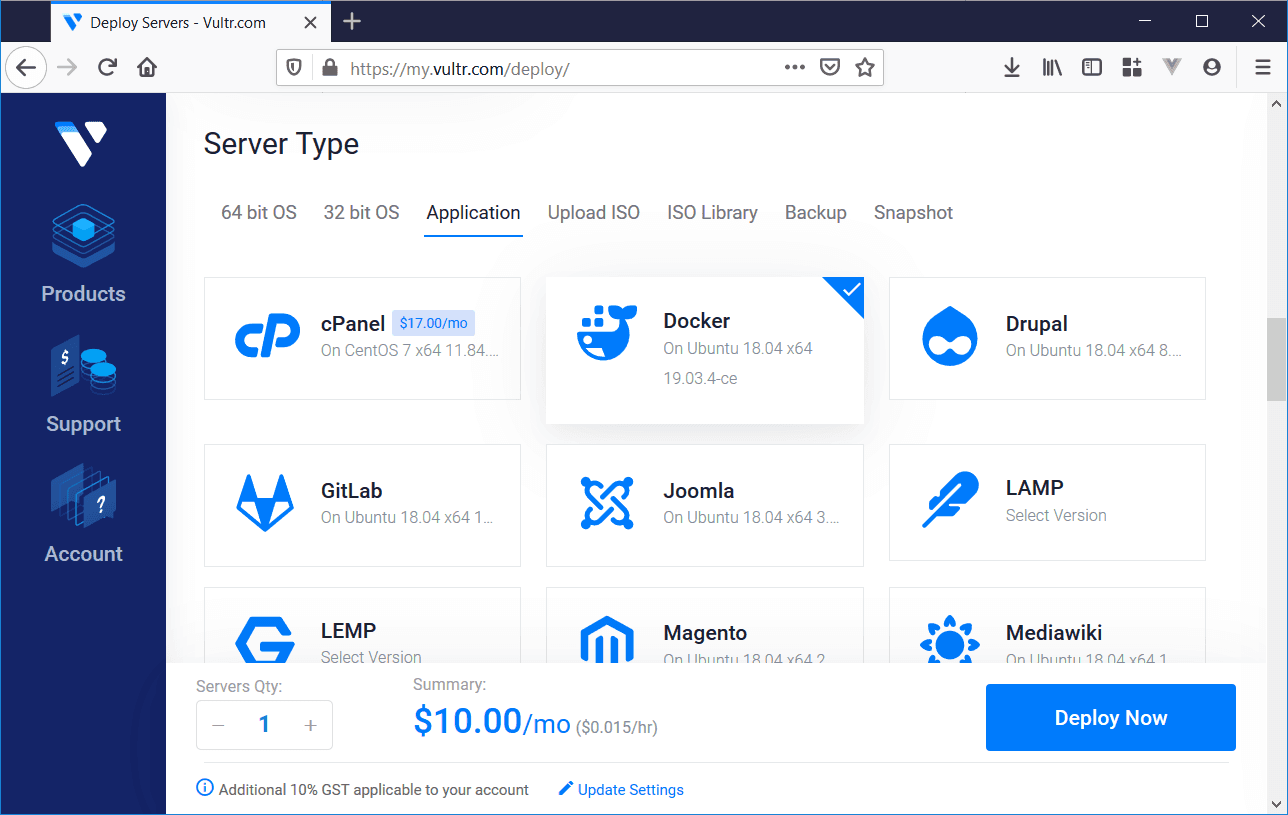
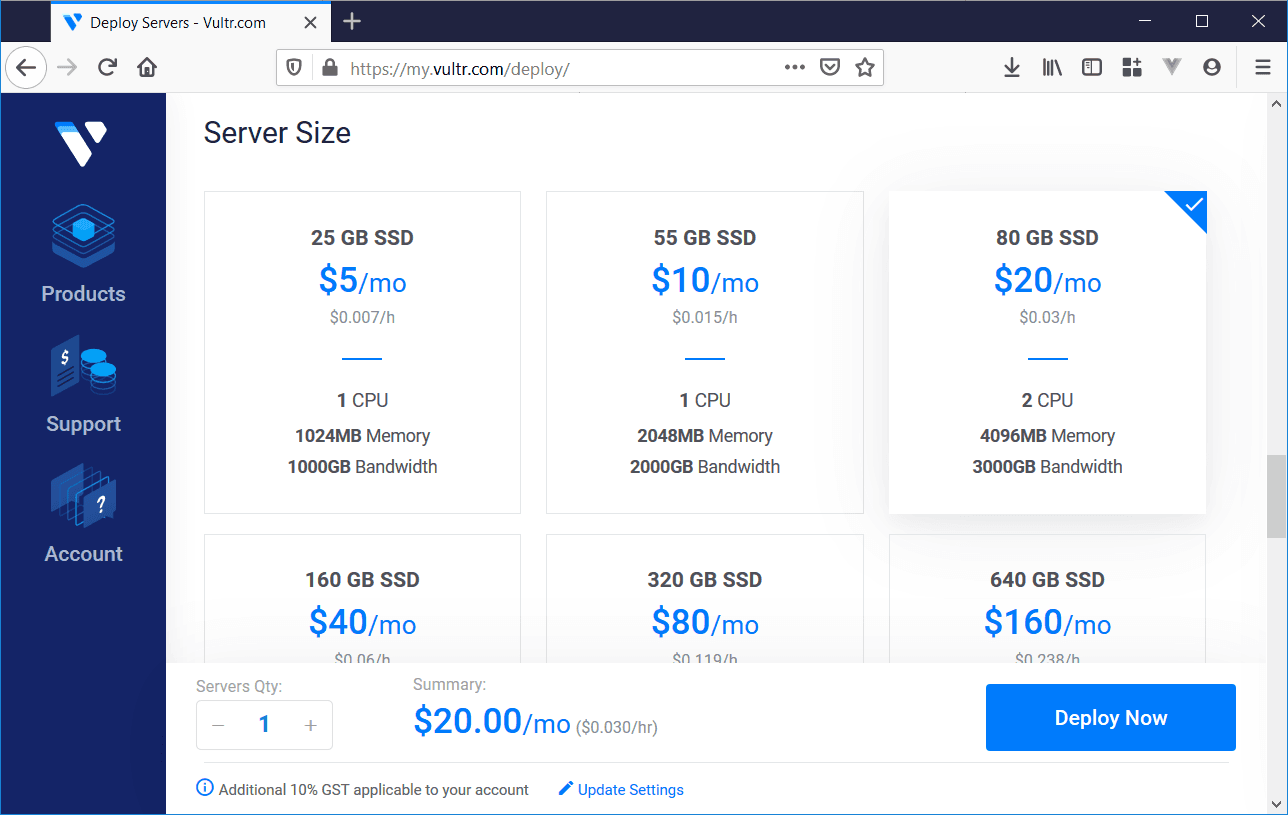
From the Vultr Dashboard, click Products icon and click Plus icon to deploy a new server. Select Cloud Compute server and select the Server Location of your choice. For the Server Type, click Application tab, and select Docker as the application and Ubuntu as the server type. For Server Size we'll select 2 CPU, 4GB, 80 GB SSB which currently
costs $20pm.
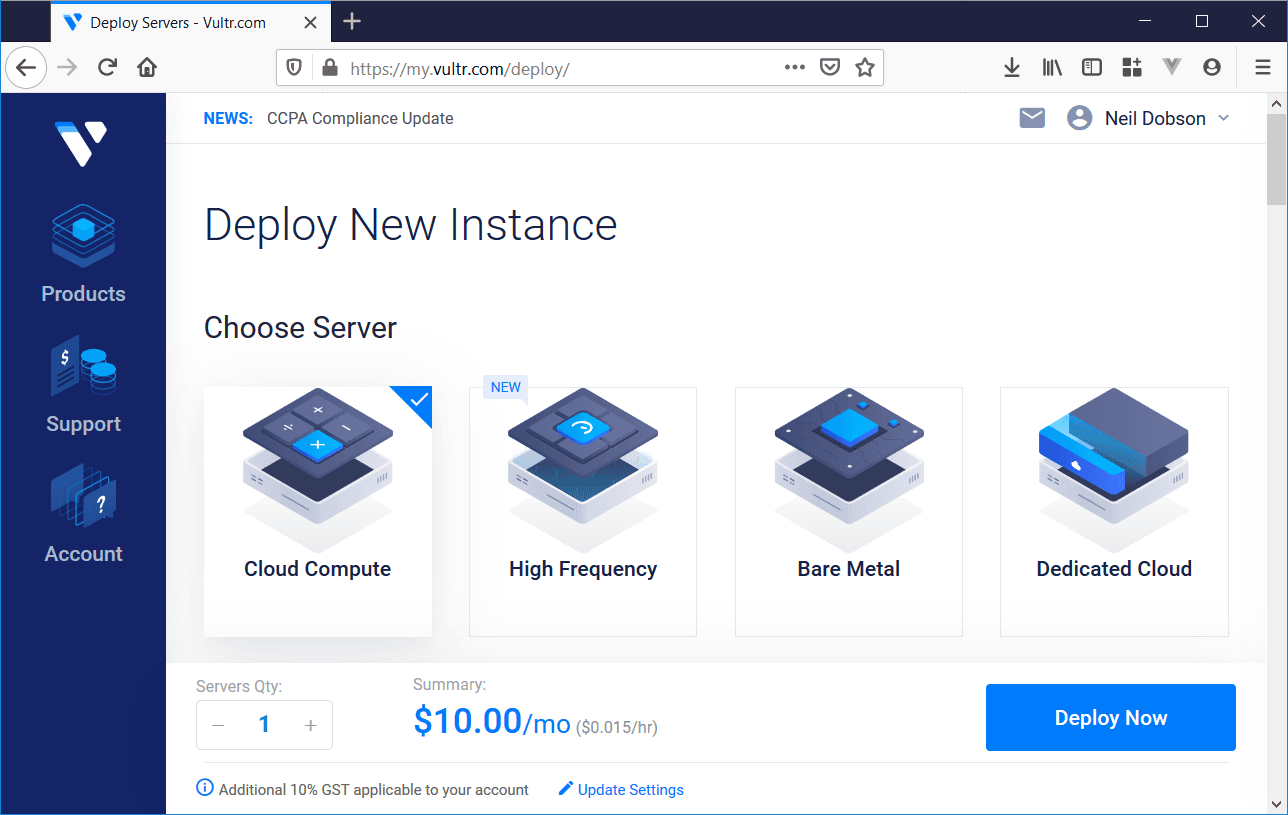
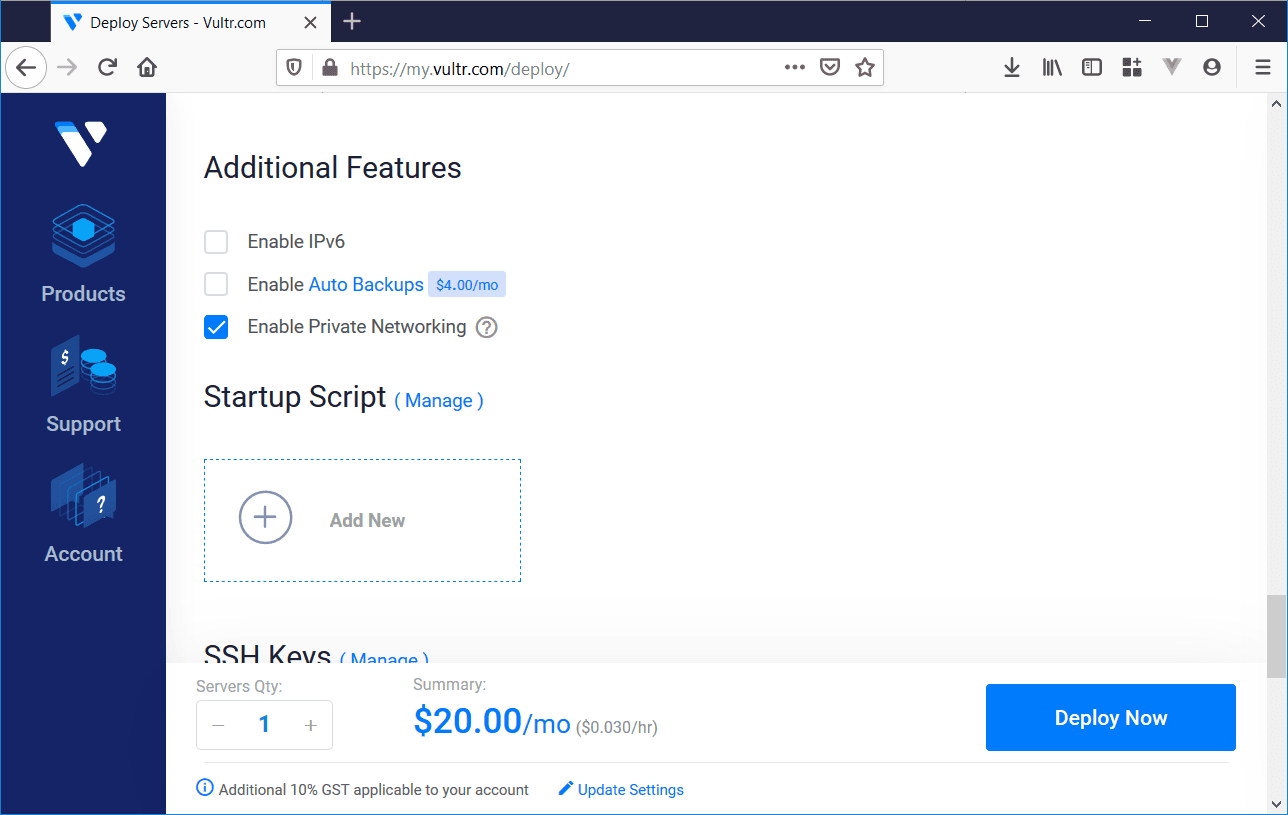
In Additional Features section, tick Enable Private Networking. This is important as we'll be using it to allow VMs private access to the containers without exposing them to the public internet.
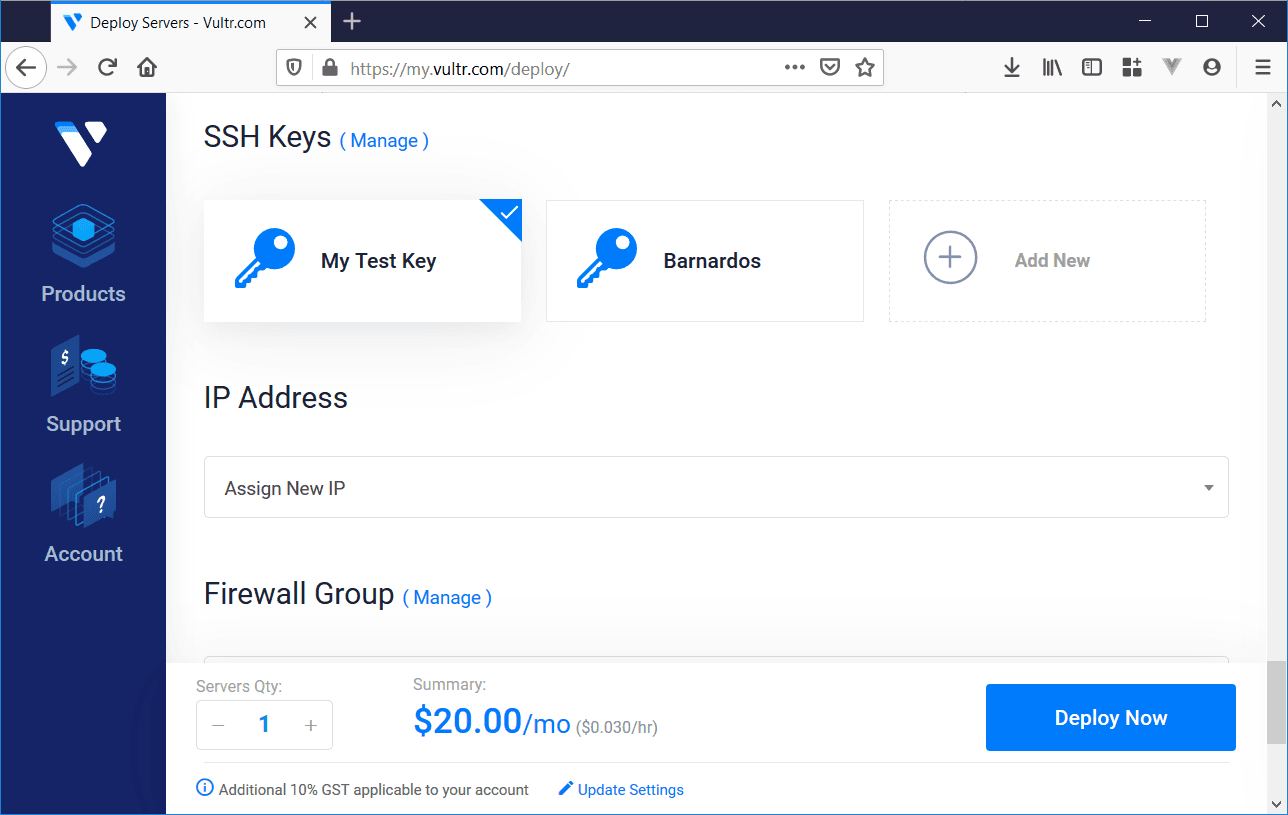
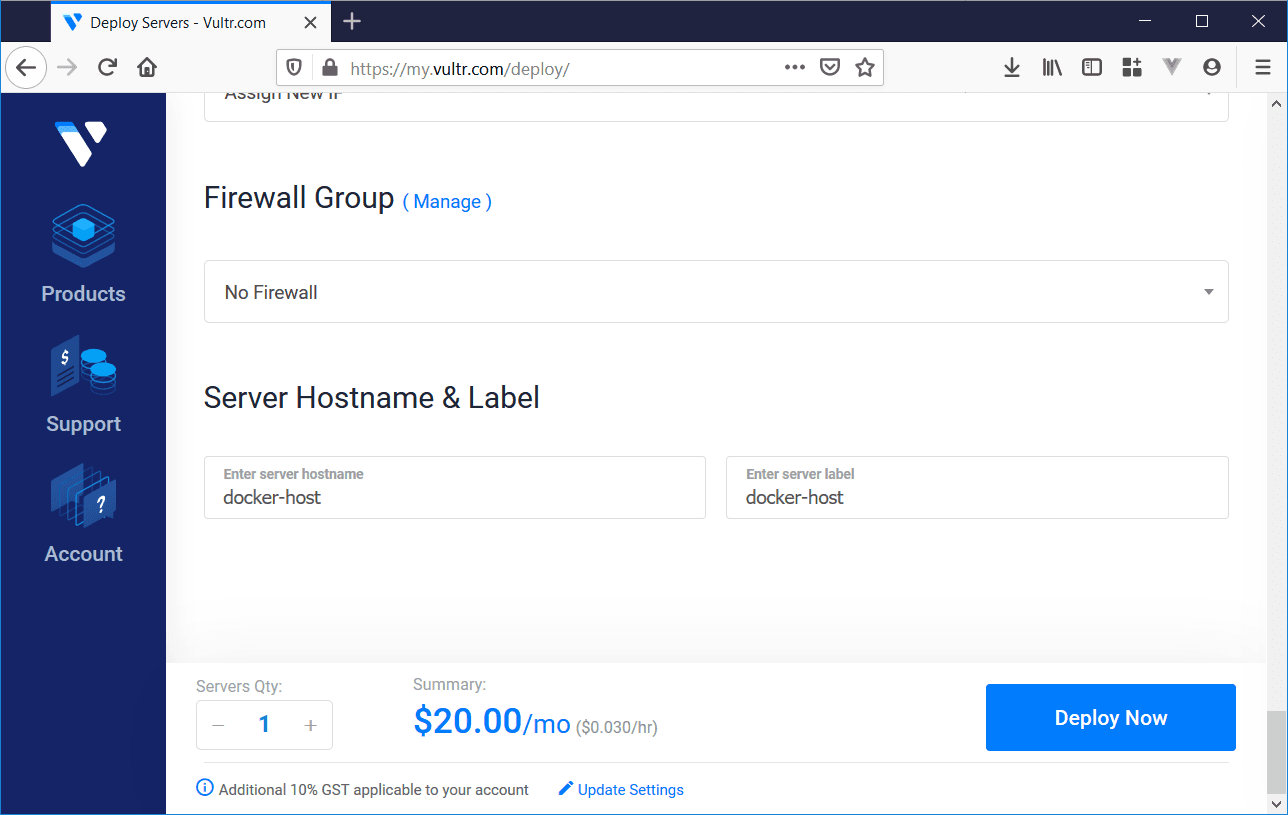
In SSH Keys section select your key you added earlier and finally, in Server Hostname & Label section give your new server a name and label, which will appear in your dashboard. Click Deploy Now button.
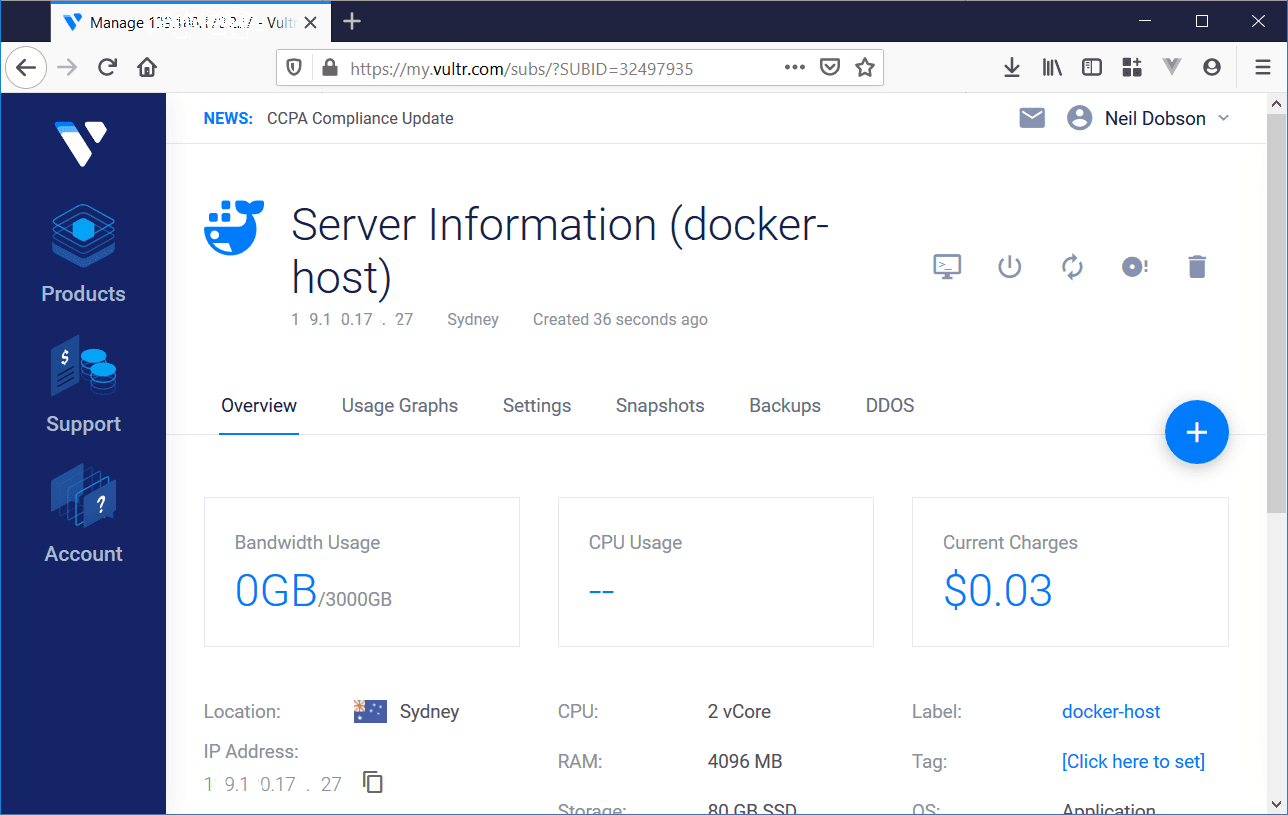
It should take just a few minutes to provision the new server. You should shortly be able to click on the server from the dashboard to see its progress.
Connect to Virtual Machine
Once provisioning is complete you should now be able to SSH into the VM and run commands including Docker.
To SSH into the VM you'll need to obtain the Username and IP Address of the VM. Both can be found in the Overview tab of the Virtual Machine in the Vultr dashboard. Currently, Vultr defaults to root as the username. Type ssh root@1.2.3.4 where 1.2.3.4 is the IP address of the VM.
SSH will locate your stored Private key and ask you for the passphrase you used when you generated the keys. You should now be connected to your Docker host VM.
PS C:\Users\ndobson> ssh root@1.2.3.4
Enter passphrase for key 'C:\Users\ndobson/.ssh/id_rsa':
Welcome to Ubuntu 18.04.3 LTS (GNU/Linux 4.15.0-72-generic x86_64)

 * Documentation:  https://help.ubuntu.com
 * Management:     https://landscape.canonical.com
 * Support:        https://ubuntu.com/advantage

  System information as of Mon Jan 13 00:54:47 UTC 2020

  System load:  0.0               Processes:              94
  Usage of /:   3.5% of 78.71GB   Users logged in:        0
  Memory usage: 5%                IP address for ens3:    1.2.3.4
  Swap usage:   0%                IP address for docker0: 172.17.0.1


13 packages can be updated.
9 updates are security updates.


Last login: Mon Jan 13 00:49:50 2020 from 103.9.62.144
root@docker-host:~#
Docker Test
Docker was pre-installed as an application by Vultr and so it should be ready for use. Let's try a simple Docker test. Type docker run hello-world. You should see a response similar to the following.
root@docker-host:~# docker run hello-world
Unable to find image 'hello-world:latest' locally
latest: Pulling from library/hello-world
1b930d010525: Pull complete
Digest: sha256:d1668a9a1f5b42ed3f46b70b9cb7c88fd8bdc8a2d73509bb0041cf436018fbf5
Status: Downloaded newer image for hello-world:latest

Hello from Docker!
This message shows that your installation appears to be working correctly.

To generate this message, Docker took the following steps:
 1. The Docker client contacted the Docker daemon.
 2. The Docker daemon pulled the "hello-world" image from the Docker Hub.
    (amd64)
 3. The Docker daemon created a new container from that image which runs the
    executable that produces the output you are currently reading.
 4. The Docker daemon streamed that output to the Docker client, which sent it
    to your terminal.

To try something more ambitious, you can run an Ubuntu container with:
 $ docker run -it ubuntu bash

Share images, automate workflows, and more with a free Docker ID:
 https://hub.docker.com/

For more examples and ideas, visit:
 https://docs.docker.com/get-started/

root@docker-host:~#
Now we'll install the first of our container applications, Neo4j.
Part 2: Install Neo4j
Type the following to deploy and run Neo4j as a Docker container.
docker run \
  --publish=7474:7474 \
  --publish=7687:7687 \
  --volume=$HOME/neo4j/data:/data \
  --name neo4j-test \
  -d \
  neo4j
This should return the following:
root@docker-host:~# docker run \
>     --publish=7474:7474 \
>     --publish=7687:7687 \
>     --volume=$HOME/neo4j/data:/data \
>     --name neo4j-test \
>     -d \
>     neo4j
ab9f08a8e50d36dead96fe8463fc8200a3c0f1fa005eb0e3d1ea5b391033a94b
root@docker-host:~# docker ps
CONTAINER ID        IMAGE               COMMAND                  CREATED             STATUS              PORTS                                                      NAMES
ab9f08a8e50d        neo4j               "/sbin/tini -g -- /d…"   40 seconds ago      Up 40 seconds       0.0.0.0:7474->7474/tcp, 7473/tcp, 0.0.0.0:7687->7687/tcp   frosty_raman
root@docker-host:~#
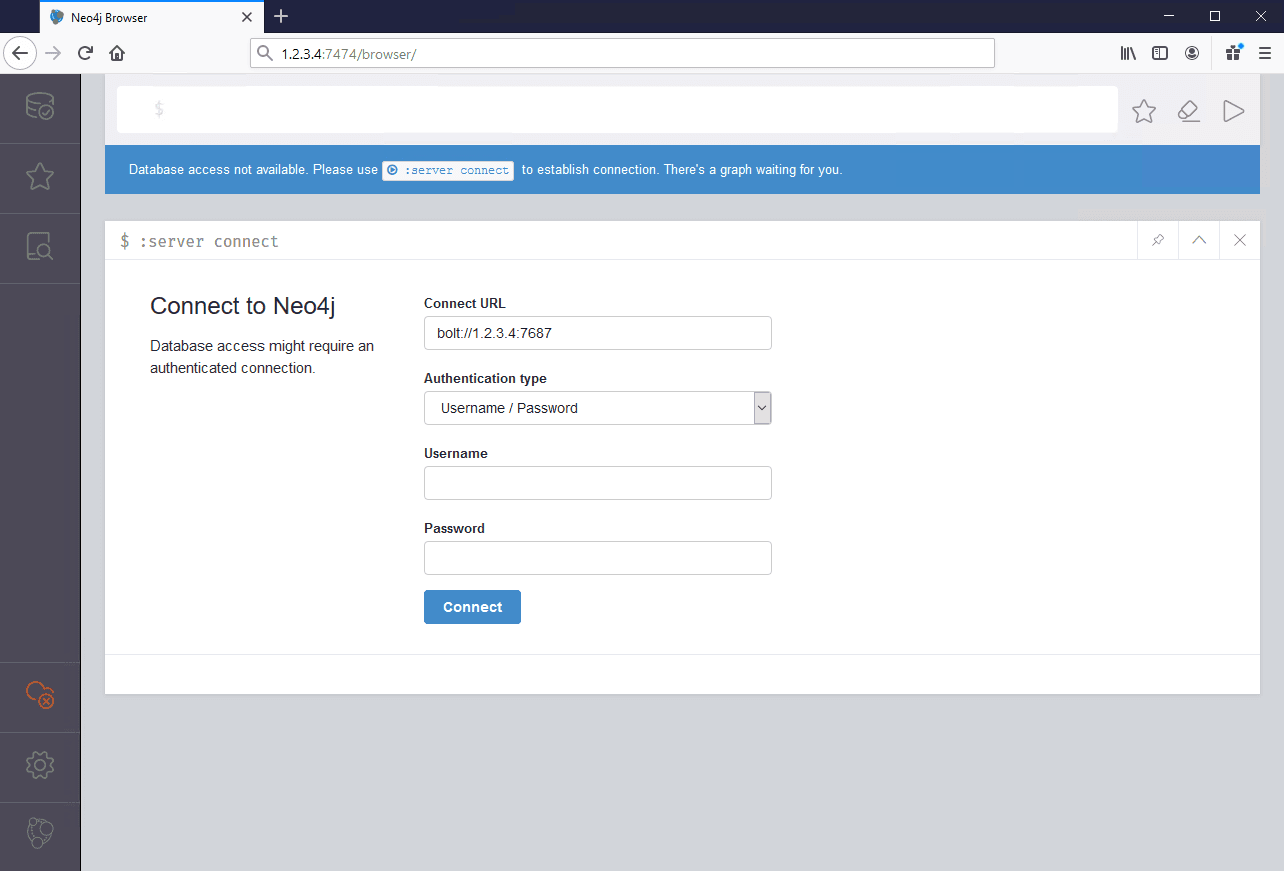
Now you should be able to see Neo4j running when you web browse to your Docker host IP using port 7474. Example: http://1.2.3.4:7474/ where 1.2.3.4 is the IP address of your Docker host. And Neo4j is running. Great!!!
As we're using private networking, we'll need to ensure that applications are only exposed to the private subnet. For that, we'll need to do some more work setting up our network. For now, we'll stop and remove Neo4j. Type docker stop neo4j-test followed by docker rm neo4j-test to stop and remove Neo4j container.
Set-up Private Network
Back to our Vultr dashboard, navigate to the Docker host VM and click Settings tab. Under the Private Network section you should see an IP address shown. This is allocated by Vultr because you selected Enable Private Networking during deployment.
Now we have an IP address we need to configure the OS to use this address by setting up our additional network adapter and entering this address as a static IP. There is a document which explains how to set-up networks with different Operating Systems, but a simpler approach is to click the networking configuration link under the Public Network section. This provides a handy page where the exact configuration can be copy-pasted into your terminal.
Assuming you're still SSHd into your Docker host, click the networking configuration under the Public Network section in your VM settings in the Vultr dashboard. It should present a page with sections for common OS versions. Find the latest one for Ubuntu, currently titled Ubuntu 17.10, Ubuntu 18.xx, Ubuntu 19.xx and see the second part which is a yaml file for setting up the private IP address (range 10.0.0.0).
In your shell, type nano /etc/netplan/10-ens7.yaml to edit the yaml file (it will probably be empty). Now paste in the given text from the document.
network:
  version: 2
  renderer: networkd
  ethernets:
    ens7:
      match:
        macaddress: 5a:00:02:7e:17:f2
      mtu: 1450
      dhcp4: no
      addresses: [10.99.0.12/24]
Now save the document (click Ctrl-O and press Enter) and exit (click Ctrl-X) type netplan apply. To update your networking configuration. Now type ifconfig to verify. It should contain a section similar to the following:
ens7: flags=4163<UP,BROADCAST,RUNNING,MULTICAST>  mtu 1450
        inet 10.99.0.12  netmask 255.255.255.0  broadcast 10.99.0.255
        inet6 fe80::5800:2ff:fe7e:17f2  prefixlen 64  scopeid 0x20<link>
        ether 5a:00:02:7e:17:f2  txqueuelen 1000  (Ethernet)
        RX packets 999  bytes 175276 (175.2 KB)
        RX errors 0  dropped 0  overruns 0  frame 0
        TX packets 5  bytes 426 (426.0 B)
        TX errors 0  dropped 0 overruns 0  carrier 0  collisions 0
The inet value should match the IP address given in Vultr dashboard. Now you have a working private IP address, the containerised applications can be secured to listen only on this address, and block outside internet traffic.
Run Neo4j on private network
Let's modify our Docker command to run Neo4j privately. Type the following:
docker run \
    --publish=10.99.0.12:7474:7474 \
    --publish=10.99.0.12:7687:7687 \
    --volume=$HOME/neo4j/data:/data \
    --name neo4j-test \
    -d \
    neo4j
Here we've modified the publish ports to map traffic from ports 7474 & 7687 inside the container to the same host ports, but only on host IP address 10.99.0.12. This means that the only way I can access the container is through the private host IP address. We can verify this by attempting to navigate to the public IP address as before. Example: http://1.2.3.4:7474/ where 1.2.3.4 is your public IP address. You should not be able to access the Neo4j console.
Test access through private network
To test our private network is working, we'll need a second Virtual Machine configured with private networking so that we can use it to connect to our Docker host.
Easiest is to create an Ubuntu server in the same location using similar steps to above, ensuring to tick Enable Private Networking and ensuring that after provisioning that the second IP address is set-up and is visible when typing ifconfig.
root@docker-test:~# ifconfig
ens7: flags=4163<UP,BROADCAST,RUNNING,MULTICAST>  mtu 1450
        inet 10.99.0.13  netmask 255.255.255.0  broadcast 10.99.0.255
        inet6 fe80::5800:2ff:fe7e:1eee  prefixlen 64  scopeid 0x20<link>
        ether 5a:00:02:7e:1e:ee  txqueuelen 1000  (Ethernet)
        RX packets 86  bytes 19390 (19.3 KB)
        RX errors 0  dropped 0  overruns 0  frame 0
        TX packets 15  bytes 1230 (1.2 KB)
        TX errors 0  dropped 0 overruns 0  carrier 0  collisions 0
In our test machine, we have an IP address of 10.99.0.13. If all is well you should be able to ping the Docker host using ping 10.0.0.0 where 10.0.0.0 is the private IP address of your Docker host.
root@docker-test:~# ping 10.99.0.12
PING 10.99.0.12 (10.99.0.12) 56(84) bytes of data.
64 bytes from 10.99.0.12: icmp_seq=1 ttl=64 time=0.548 ms
64 bytes from 10.99.0.12: icmp_seq=2 ttl=64 time=0.431 ms
64 bytes from 10.99.0.12: icmp_seq=3 ttl=64 time=0.701 ms
Once we can successfully ping our Docker host we can then run curl to test our Neo4j container is responding to requests from the guest VM.
root@docker-test:~# root@docker-test:~# curl 10.99.0.12:7474
{
  "data" : "http://10.99.0.12:7474/db/data/",
  "management" : "http://10.99.0.12:7474/db/manage/",
  "bolt" : "bolt://10.99.0.12:7687"
}root@docker-test:~#
In this case, Neo4j is working as expected and is returning the various endpoints.
Part 3: Install Redis
Part 3 of our Docker set-up will include a Redis container. As before we need to SSH into our Docker host to deploy Redis.
From our original client machine which we used to generate the SSH keys, type ssh root@1.2.3.4 where 1.2.3.4 is the public IP address of the Docker host.
SSH will locate your stored Private key and ask you for the passphrase you used when you generated the keys. You should now be connected to your Docker host VM.
Let's do a quick check of the docker containers on our host.
root@docker-host:~# docker ps
CONTAINER ID        IMAGE               COMMAND                  CREATED             STATUS              PORTS                                                            NAMES
8f0bec4d8904        neo4j               "/sbin/tini -g -- /d…"   2 hours ago         Up 2 hours          10.99.0.12:7474->7474/tcp, 7473/tcp, 10.99.0.12:7687->7687/tcp   neo4j-test
root@docker-host:~#
We'll now add Redis. Type the following:
ifconfig to locate it.docker run \
--publish=10.99.0.12:6379:6379 \
--name redis-test \
-d \
redis
You should now have a Redis instance up-and-running. For more information about running Redis on Docker see my other article.
root@docker-host:~# docker run \
>     --publish=10.99.0.12:6379:6379 \
>     --name redis-test \
>     -d \
>     redis
Unable to find image 'redis:latest' locally
latest: Pulling from library/redis
8ec398bc0356: Already exists
da01136793fa: Pull complete
cf1486a2c0b8: Pull complete
a44f7da98d9e: Pull complete
c677fde73875: Pull complete
727f8da63ac2: Pull complete
Digest: sha256:90d44d431229683cadd75274e6fcb22c3e0396d149a8f8b7da9925021ee75c30
Status: Downloaded newer image for redis:latest
75b1b843cad0928861269410bd6f39ee38b1c2b009f2bc425d7216ec2acb88c4
root@docker-host:~#
Perform a quick check by executing a command using the redis-cli inside the container. Type docker exec -it redis-test bash and from within the container type redis-cli. Now type some redis commands, and type exit to finish.
root@docker-host:~# docker exec -it redis-test bash
root@75b1b843cad0:/data# redis-cli
127.0.0.1:6379> keys *
(empty list or set)
127.0.0.1:6379> incr my-key
(integer) 1
127.0.0.1:6379> incr my-key
(integer) 2
127.0.0.1:6379> keys *
1) "my-key"
127.0.0.1:6379> exit
root@75b1b843cad0:/data# exit
exit
root@docker-host:~#
Test access through private network
We can return to our guest VM and install the Redis CLI tools to perform the same test. Run apt-get install redis-tools from the guest VM. Now run redis-cli -h 10.0.0.0 where 10.0.0.0 is the private IP address of the Docker host.
root@docker-test:~# redis-cli -h 10.99.0.12
10.99.0.12:6379> keys *
1) "my-key"
10.99.0.12:6379> incr my-key
(integer) 3
10.99.0.12:6379> exit
root@docker-test:~# exit
logout
Connection to 1.2.3.4 closed.
Part 4: Create Docker Compose file to run both Neo4j & Redis containers
The final part is to create a single yaml document which describes both Neo4j & Redis configurations. Docker Compose will
launch both containers and optionally automatically restart both if configured correctly.
As we'll be managing containers through Docker Compose from this point on, we first need to delete the ones we created manually. From the Docker host terminal, type the following to stop & remove the containers.
docker stop neo4j-test
docker rm neo4j-test
docker stop redis-test
docker rm redis-test
docker ps -a
CONTAINER ID        IMAGE               COMMAND             CREATED             STATUS              PORTS               NAMES
Install Docker Compose
Compose is not installed by default, so this must be done first. From the Docker host console,
type apt install docker-compose. Once installed, type docker-compose to test.
root@docker-host:~# docker-compose
Define and run multi-container applications with Docker.

Usage:
  docker-compose [-f <arg>...] [options] [COMMAND] [ARGS...]
  docker-compose -h|--help
  ...
  ...
Now create a docker-compose.yml file. Type nano edit ./docker-compose.yml and enter the following:
version: '3'
services:
  neo4j:
    image: neo4j
    container_name: test-neo4j
    ports:
      - '10.99.0.12:7474:7474'
      - '10.99.0.12:7687:7687'
    volumes:
      - $HOME/neo4j/data:/data
    restart: always
  redis:
    image: redis
    container_name: test-redis
    ports:
      - '10.99.0.12:6379:6379'
    restart: always
Save the file and run docker-compose up.
root@docker-host:~# docker-compose up
Creating network "root_default" with the default driver
Creating test-redis ...
Creating test-neo4j ...
Creating test-redis
Creating test-neo4j ... done
Attaching to test-redis, test-neo4j
test-redis | 1:C 13 Jan 2020 04:50:16.600 # oO0OoO0OoO0Oo Redis is starting oO0OoO0OoO0Oo
test-redis | 1:C 13 Jan 2020 04:50:16.600 # Redis version=5.0.7, bits=64, commit=00000000, modified=0, pid=1, just started
test-redis | 1:C 13 Jan 2020 04:50:16.600 # Warning: no config file specified, using the default config. In order to specify a config file use redis-server /path/to/redis.conf
test-redis | 1:M 13 Jan 2020 04:50:16.601 * Running mode=standalone, port=6379.
test-redis | 1:M 13 Jan 2020 04:50:16.601 # WARNING: The TCP backlog setting of 511 cannot be enforced because /proc/sys/net/core/somaxconn is set to the lower value of 128.
test-redis | 1:M 13 Jan 2020 04:50:16.601 # Server initialized
test-redis | 1:M 13 Jan 2020 04:50:16.601 # WARNING overcommit_memory is set to 0! Background save may fail under low memory condition. To fix this issue add 'vm.overcommit_memory = 1' to /etc/sysctl.conf and then reboot or run the command 'sysctl vm.overcommit_memory=1' for this to take effect.
test-redis | 1:M 13 Jan 2020 04:50:16.601 # WARNING you have Transparent Huge Pages (THP) support enabled in your kernel. This will create latency and memory usage issues with Redis. To fix this issue run the command 'echo never > /sys/kernel/mm/transparent_hugepage/enabled' as root, and add it to your /etc/rc.local in order to retain the setting after a reboot. Redis must be restarted after THP is disabled.
test-redis | 1:M 13 Jan 2020 04:50:16.601 * Ready to accept connections
test-neo4j | Active database: graph.db
test-neo4j | Directories in use:
test-neo4j |   home:         /var/lib/neo4j
test-neo4j |   config:       /var/lib/neo4j/conf
test-neo4j |   logs:         /logs
test-neo4j |   plugins:      /var/lib/neo4j/plugins
test-neo4j |   import:       /var/lib/neo4j/import
test-neo4j |   data:         /var/lib/neo4j/data
test-neo4j |   certificates: /var/lib/neo4j/certificates
test-neo4j |   run:          /var/lib/neo4j/run
test-neo4j | Starting Neo4j.
test-neo4j | 2020-01-13 04:50:18.772+0000 INFO  ======== Neo4j 3.5.14 ========
test-neo4j | 2020-01-13 04:50:18.784+0000 INFO  Starting...
test-neo4j | 2020-01-13 04:50:21.055+0000 INFO  Bolt enabled on 0.0.0.0:7687.
test-neo4j | 2020-01-13 04:50:22.630+0000 INFO  Started.
test-neo4j | 2020-01-13 04:50:23.705+0000 INFO  Remote interface available at http://localhost:7474/
Both Neo4j & Redis should now be running. However, we're not done yet. Docker Compose is running the containers in the foreground. We need the containers to be running in the background (detached) state so that we can exit from our host.
Type Ctrl-C to shutdown the containers. Now run docker-compose up -d to start in detached state.
root@docker-host:~# docker-compose up -d
Starting test-redis ...
Starting test-neo4j ...
Starting test-redis
Starting test-neo4j ... done
root@docker-host:~#
We can confirm the containers are running with docker ps.
root@docker-host:~# docker ps
CONTAINER ID        IMAGE               COMMAND                  CREATED             STATUS              PORTS                                                            NAMES
ad455c218b3e        neo4j               "/sbin/tini -g -- /d…"   4 minutes ago       Up 29 seconds       10.99.0.12:7474->7474/tcp, 7473/tcp, 10.99.0.12:7687->7687/tcp   test-neo4j
468d639ed06f        redis               "docker-entrypoint.s…"   4 minutes ago       Up 30 seconds       10.99.0.12:6379->6379/tcp                                        test-redis
As a final test, we can reboot the Docker host VM to check that the restart policy of always is working in our compose file. Type reboot in our Docker host terminal.
root@docker-host:~# reboot
Connection to 1.2.3.4 closed by remote host.
Connection to 1.2.3.4 closed.
Wait for a few minutes and then SSH back into our Docker host. Run docker ps to check that our containers have started up after the reboot.
root@docker-host:~# docker ps
CONTAINER ID        IMAGE               COMMAND                  CREATED             STATUS              PORTS                                                            NAMES
ad455c218b3e        neo4j               "/sbin/tini -g -- /d…"   9 minutes ago       Up 2 minutes        10.99.0.12:7474->7474/tcp, 7473/tcp, 10.99.0.12:7687->7687/tcp   test-neo4j
468d639ed06f        redis               "docker-entrypoint.s…"   9 minutes ago       Up 2 minutes        10.99.0.12:6379->6379/tcp                                        test-redis
root@docker-host:~#
And there we have it, our Neo4j & Redis containers are now running again and should be accessible from other Virtual Machines on the same private subnet.
Summary
In this post I demonstrated how to:
- Provision and deploy a Docker host on Ubuntu Server running on Vultr cloud.
- Enable and configure private networking.
- Set-up SSH keys.
- Deploy Neo4j & Redis containers.
- Secure containers for access through the private network.
- Install Docker Compose.
- Set-up a compose file containing the Neo4j & Redis container configuration.
- Enable automatic container restart.
Useful links
| Item | Link |
|---|---|
| Vultr Cloud | https://www.vultr.com/ |
| Docker CLI docs | https://docs.docker.com/engine/reference/commandline/docker/ |
| Docker Compose CLI docs | https://docs.docker.com/compose/reference/overview/ |
| Redis Docker hub | https://hub.docker.com/_/redis/ |
| Redis docs | https://redis.io/documentation |
| Neo4j Docker hub | https://hub.docker.com/_/neo4j/ |
| Neo4j docs | https://neo4j.com/docs/ |